Dinosaur Kale Mac and Cheese

Because dinosaurs are cool.

Chili and Lime Black Bean Burger

The perfect vegan burger!

Beer Battered Halloumi

Nom, nom, nom.

Ginger and Chili Tofu

Crispy delicious tofu that's easy to make... say what?

Chocolate Cake Balls

Cakes, but not as you know them.

Sunday 27 May 2012

The Infamous Slutty Brownie

Loads of people have sent me these brownies telling me to make them. The genius creator The Londoner claimed that they are the best brownies ever (my friend Laura backed up this claim after making them) and to be honest the look delicious so of course I had to see what all the fuss was about. The original recipe calls for box mixes (the lovely Betty Crocker of course!), but I thought I'd be bold and try to make it all from scratch using my favourite cookie and brownie recipes. Luckily I had my baking assistant Mike on hand who pretty much did all the work, while I fannied about with my camera and got told off for not keeping an eye on the melting chocolate. I can honestly say they are the best I've tried so far! 


Recipe adapted from The Londoner:


For the cookie base:

110g butter
110g caster sugar
65g light brown sugar
1 egg
1/2 tsp vanilla extract
275g flour
1/2 tsp baking powder
100g milk chocolate chips
2 packs veggie oreos 
For the brownie:

115g Dark chocolate 
225g butter
350g caster sugar 
4 eggs 
50g plain flour
50g cocoa powder
A few drops of vanilla extract.


  1. First make the cookie base by creaming together the butter and sugars until soft, then add the egg and mix well.
  2. Add the flour, baking powder and chocolate chips and fold in well.
  3. Spread the cookie dough along the bottom of a grease proof paper covered brownie tin and top with oreos.
  4. Then to make the brownie mixture, melt the chocolate and butter in a bain marie.
  5. Whisk the sugar and eggs together in a large bowl until they have trebled in volume.
  6. Sieve the flour and cocoa powder in to the mixture, then pour in the melted chocolate and butter mixture and mix together.
  7. Pour the brownie mixture over the cookies, pop in the oven for 40 minutes at 180 degrees.
  8. Enjoy!

Saturday 26 May 2012

Beer Battered Halloumi

I don't know about other veggies, but sometimes I miss having something deep fried with chips on the side (this may be where the fatty heffa nickname comes from). And after trying the butter milk soaked halloumi at Terre a Terre I wanted to see if I could try it myself with beer batter (mmmm). Of course this is no where near as good as their butter milk soaked recipe, If you've never been you need to try it! But it is super delicious, fairly simple and makes a good replacement for a Friday night take away! 

Serves 2:

65g plain white flour
15g corn flour
100ml vegetarian ale at room temperature
100 ml soda waster
225g halloumi cut in to 4 triangles


  1. Heat vegetable oil in a deep fryer, or a heavy based pan (enough for deep frying) to 180 degrees, or until a bread crumb crisps and turns brown straight away.
  2. Make the batter by putting the flours, soda water and ale in a bowl and whisking until smooth, let rest for 15 minutes, then whisk again for around 30 seconds.
  3. Dust the halloumi with flour then dip in the batter and make sure it's coated really well. 
  4. Pop into the deep fryer or pan and fry until it's a light golden colour. 
  5. Remove from the oil and place on to some kitchen roll to remove the excess oil.
  6. Serve up with some homemade chips and peas (I would have mushy if my boyfriend liked them) and enjoy! 

Friday 25 May 2012

Thai Coconut Soup

A combination of things made me want to make this soup. 1. I got caught in horrible torrential rain and wanted something really warming. 2. I found something similar in the shops but it had fish in it (lame). 3. I love soup. I based the vegetables on one of my favourite dishes from Wagamama, the Yasai Itame (minus the mushrooms, bleugh) and used lemongrass and chili for a spicy, fragrant flavour. 


1 stalk lemon grass (outer leaves peeled off)
1 small green chilli
1 clove garlic
A thumb of galangal
2 handfuls of fresh coriander
300 ml coconut milk
400ml vegetable stock
Juice of 1 lime
1 pak choi sliced and leaves removed
1 small red pepper sliced
1 small red onion sliced
200g dry fried tofu
Lime wedge and fresh coriander to serve

  1. Put the lemon grass, chili, garlic and coriander in a blender and blend until it’s in very, very small pieces.
  2. Heat a little oil in a heavy based pan, add the blended herbs and spices and cook for 3 minutes.
  3. Add the coconut milk, vegetable stock and lime to the pan and stir well.
  4. Bring to the boil and then let it simmer for 15 minutes.
  5. While it’s cooking, stir fry the onion, pepper and pak choi (not including the leaves, they can be popped in at the end). Fry them until starting to soften, then pop them in to the bowls your using.
  6. Add the pak choi leaves to the soup within the last 5 minutes of cooking.
  7. Pour the soup over the vegetables and top with the tofu, coriander and a lime wedge.
  8. Enjoy!

Thursday 24 May 2012

Grove Farm Take 2

Grove farm has become my new favourite place, I don't know why I get so much joy out of digging up vegetables with masses of oldies, but I do! So my PIC Mike and I went back last week and picked, dug and pulled some more goodies. This time we didn't really know what we wanted, but ended up with red onions, french beans, rhubarb, raspberries, leeks and parsnips. This is what we made:


Rhubard
Mike with a massive parsnip 
garlic
In the end we decided to make a caramelsied onion and goats cheese tart with parmesan (veggie of course) and parsnip mash and garlicy beans. For desert we made rhubard crumble, although we didn't have custard which was a MASSIVE disappointment!


You can find the caramelised onion tart recipe here, and to make the mash and beans is super simple. All you need to do is boil the parsnips, then drain and mash with parmesan, butter and lots of black pepper. Then boil the beans, drain and fry with crushed garlic and butter. Serve together and enjoy!

Caramelised Onion and Goats Cheese Tart

I love caramelised onions and goats cheese, it is a match made in foodie heaven. So when it's added to a big lump of puff pastry it is the ideal summer comfort food for me! I make this recipe all the time because it's so quick, easy and absolutely delicious.


Serves 4

2 red onions sliced
1 tsp olive oil
1 tsp brown sugar
2 tsp balsamic vinegar
2 tsp water
1/2 pack vegetarian puff pastry
small pack of goats cheese

  1. Soften the onions in the olive oil until translucent, then add the sugar and mix in well. 
  2. Fry until caramelised, and then add the balsamic vinegar and water and keep on a low heat stirring occasionally stirring until all the water and vinegar has been absorbed. 
  3. When the onions are ready take them off of the heat and roll out the pastry in to a large rectangle and spread the onions over the top.
  4.  Cut up the goats cheese and scatter it around, cook for around 20 minutes and serve with some new potatoes and veg.

Wednesday 23 May 2012

Beaver Quiche and Ice Cream Balls

My friend Emma came over last night so we decided to cook up a vegan feast for dinner, after some internet research we decided to make a quiche, some ice cream balls from the Your Vegan Mom blog and ginger beer from the Vegan Swedes. We called the quiche 'Beaver Quiche' as that's what my partially deaf brother thought we were saying (haha). And this is how we made it:


serves 4-6:

1 pack just roll short crust pastry
olive oil
2 red onions chopped
2 tbsp brown sugar
2 tbsp balsamic vinegar
200g purple sprouting broccoli chopped
1 pack of firm tofu
1/2 tsp nutmeg
1/2 tsp tumeric
1 tbsp herb and garlic (or mixed herbs)
1/2 tsp salt
1/2 tsp pepper
100 ml soy milk


  1. Preheat the oven to 200 degrees and start by rolling out the pastry, covering your quiche tin and cutting round the edges (leaving extra for shrinkage).
  2. Bake for around ten minutes in the oven, then leave to cool. Then make your caramelised onions by sweating the onions for a few minutes and adding the sugar to caramelise. Once all the sugar has dissolved add the balsamic vinegar and reduce down.
  3. When they're ready spread half of the onions along the pastry, add the broccoli to the remaining of the onions and cook on a low heat for around 10 minutes.
  4. While the broccoli and onions are cooking make the filling by putting the tofu, spices, herbs, salt, pepper and milk into a blender and blend until smooth.
  5. Add the filling to the onions and broccoli and mix well.
  6. Pour the mixture into the pastry case and bake in the oven for 40 minutes until a knife popped in the middle comes out clean.
  7. Serve with some seasonal veg (we had grilled asparagus and mustard mash) and enjoy!

Then for desert we made these ice cream balls with chocolate dip, the only change we made was that we rolled them in coconut as well as nuts. They were lovely, and even my brother enjoyed them despite usually turning his nose up at most things vegan!


You can find the recipe here


And to wash it all down we made some homemade ginger beer. I think this recipe is kind of cheating as my mum said that ginger beer takes ages and tends to explode. But much to our surprise it actually tasted nice and like ginger beer! You can find the recipe here.


Tuesday 22 May 2012

Ginger and Chili Tofu with Purple Sprouting Broccoli

After making miso soup I had loads of tofu and noodles left so the obvious thing to make was some sort of tofu stir-fry. I am also completely addicted to purple sprouting broccoli at the moment, I have pretty much eaten it every night for the last two weeks! So that’s how this simple tofu recipe came about, don't be put off by the long ingredients list, it's very simple to make and full of flavour.


4 tbsp sweet chilli sauce
4 tbsp soy sauce
1 tbsp grated ginger
½ small red chilli chopped
1 tbsp white wine vinegar
4 tbsp water
100g tofu chopped into chunks
4 tbsp corn flour
olive oil
purple sprouting broccoli
1 tbsp sesame seeds
80g soba noodles
spring onion to serve

  1. Make the tofu marinate by mixing together the sweet chilli sauce, soy sauce, ginger, chilli, white wine vinegar and water in a bowl then chuck to tofu in and swish it around a bit so that it is covered in marinade. 
  2. Cover with cling film and leave to soak for 2-4 hours. When ready to cook, heat the oil in a pan until very hot and boil another pan of water for the noodles. Roll the tofu in the corn flour (retain the marinade) then add to the pan turning frequently until all the sides are golden brown. 
  3. Add the noodles to the boiling water. Then turn down the heat on the tofu, add the broccoli and stir-fry for 5 minutes until the start to soften. 
  4. Add the sesame seeds and cook for a further minute, then strain the noodles and add to the pan. 
  5. Cover the noodles and tofu in the marinade and mix well. Top with sliced spring onion and serve! 

Monday 21 May 2012

Chocolate and Chipotle Black Bean Chili

One of the things I missed out on at the Chocolate Festival was the amazing veggie chocolate chili from Teabag Chihuahua. I know it was lovely from having it last year, but as we were about to go and eat in Las Iguanas I thought it would probably be a bad idea to have some. So I decided I would attempt to make some when I got home and that's what I did tonight. I think the one from Teabag Chihuahua was made with veggie mince, but I wanted to try black beans because I have recently discovered a new love for them. I also wanted to use chipotle because everything I've tried it in has tasted amazing and I thought it would be perfect for a chili. Although finding it was really difficult! You can find chipotle flavoured crisps, burgers, sauces ect, but not the actual ingredient to cook with. I ended up finding it in Waitrose (of course) in a paste.
My boyfriend was coming over for tea tonight and he's a very fussy eater, so I didn't tell him it had chocolate in it until after and had to make it quite mild (he thinks salt and vinegar crisps are spicy!) he still liked it so I'd call it a success. If I was making it for myself I would have added way more spice, but even though I didn't use much it still had loads of flavour and the chipotle gave it a really nice smokey taste. Chocolate may sound like a weird ingredient, but don't turn your nose up at it. It really does add loads of flavour without the chocolately taste.

To make it for 2 use:

Olive oil
1 onion chopped
1 clove of garlic minced
1 small red pepper chopped
2 tsp chili powder
1 tsp paprika
1/2 tsp chipotle paste
1 tin chopped tomatoes
Salt and pepper
1 tin black beans
1 square of dark chocolate (I used 85%, try not to use too much you don't want to over power it)
Spring onion, tortilla chip, soured cream, guacamole and salsa to serve.

This one is my boyfriends, covered with chili cheese! 
Fry the onion and garlic on a medium heat for about 5 minutes until soft, then add the red pepper, chili powder, paprika and chipotle paste (add more if you want it hotter, keep tasting it and add accordingly) mix well and cook for a further few minutes. Add the tomatoes and season well. Turn the heat up until simmering and add the black beans and chocolate and stir in well. Cook for around 10 minutes or until the sauce has thickened. Serve topped with spring onions with tortilla chips and dips, or rice.

The chili is vegan on it's own, providing you use dairy free chocolate!

Saturday 19 May 2012

Slutty Brownie: Cake Edition

I think I mentioned a year ago that my boyfriend doesn't really like cake, which makes it a bit challenging trying to come up with something to make him on his Birthday. Last year I made him this cookie cake, so this year I needed to come up with something bigger and better. My thought process went like this, he likes brownies, he likes cookies, he likes slutty brownies... SLUTTY BROWNIE CAKE.

So to make it deliciously bad I wanted it to have two layers of brownie cake, a giant cookie layer and Oreo frosting. The only problem is that Oreo's aren't vegetarian, but never fear! One of my lovely twitter followers has found a veggie version in Tesco

For the cake:

125g dark chocolate (over 70% cocoa solids)
225g butter 
4 large eggs
375g caster sugar
50g flour
50g cocoa powder
1 pack/500g of Betty Crocker cookie mix (or you can make your own cookie dough if you're not lazy like me)

For the frosting:

200g butter
280g icing sugar
2-3 tbsp milk 
1 pack of veggie oreos (save 4 for the top)
  1. Preheat the oven to 190 degrees, and prepare 3 8 inch cake tins by lining the bottoms with greaseproof paper. 
  2. To make the brownie layers, melt the chocolate and butter in a bain marie. 
  3. While the chocolate and butter mixture is melting whisk the eggs and sugar together until it trebles in volume, sieve the flour and cocoa powder in and then pour the melted chocolate and butter in and give it a good old mix until it's all combined. 
  4. Spread the brownie mixture evenly between 2 tins and pop in to the oven for 30 minutes. 
  5. While that's in the oven make up your cookie dough according to the instructions, flatten it in to the third tin and pop in to the oven for 15 minutes or until it's golden brown on top.
  6. When all the layers are done pop them on the side and leave them to cool completely in their tins.
  7. Make the frosting by creaming the butter, icing sugar and milk together, then smash up the veggie Oreos in a bag with a rolling pin, (leaving 4 for the top) add them to the frosting mixture and mix well.
  8. Build your cake starting with one of the brownies, then frosting, then cookie, more frosting, then the other brownie and more frosting on the top just for good measure. 
  9. Smash the last of the veggie Oreos up in to tiny pieces and sprinkle on top. 

Friday 18 May 2012

National Vegetarian Week

Did you know Hef's Kitchen is 2 years old? If I was one of those people who remembered dates and was organised and stuff, I may have done a post on it's Birthday, but I'm not. So instead I'm going to pick my 7 favourite recipes from the last 2 years and post 1 every day for National Vegetarian Week (21st-27th May). I wasn't quite sure what picture to use for this post, so here's a picture of Ruby wearing a badly photoshopped party hat, celebrating Hef's Kitchen's second birthday.
On a serious note, thank you to every one who's been reading, tweeting, face booking and commenting :) I hope you enjoy some blasts from the past over the next week! Check out Hef's Kitchen's Facebook Page for updates during the week.

Sunday 13 May 2012

Earl Grey Victoria Sponge

I love the Queen, I love her beautiful smiley face, I love her incredibly bright fashion sense and I love the fact she embodies everything British. So when I was asked to come up with a recipe that I would make for the Queen's Jubilee by Appliances Online, I wanted to make something that would embody this amazing woman. So I got thinking, what is more British than a Victoria Sponge? Well... An Earl Grey Victoria Sponge with bergamot jam.


I really wanted to find a real bergamot to use in some way, but this proved ridiculously hard and after a lot of searching I finally found citrus fruit with bergamot jam. It turned out to be great and carried the flavours of the Earl Grey cake really well, making it delightfully fresh and floral. For me it's the perfect cake to present to the queen, there's nothing more British than a Victoria Sponge! 

Serves 10 (or 1 very hungry Queen)

For the cake:
200g softened butter
200g caster sugar 
4 large eggs
200g self raising flour
3 tbsp well brewed Earl Grey tea

For the filling:
1 tsp well brewed Earl Grey tea 
Half a jar of bergamot jam (or citrus jam if you can't find it) 
100g softened butter
140g icing sugar (plus a little more for dusting)
  1. Switch your oven on to 180 degrees and grease two 8 inch baking tins.
  2. Pop your butter in to a large bowl, add the caster sugar and cream them together until light and fluffy. 
  3. Mix in the eggs, one by one until well combined.
  4. Sieve the flour into the mixture and fold in well, then fold the well brewed Earl Grey tea in. 
  5. Spoon the mixture evenly into the two tins, and pop into the oven for 25 minutes. 
  6. When the cake is looking beautiful and golden brown on top and is springy to the touch, take them out of the oven and leave to cool for 10 minutes, then transfer on to a wire rack to fully cool down.
  7. Make the butter cream by creaming the butter, icing sugar and Earl Grey tea together.
  8. Spread a nice thick layer of bergamot jam over the top of the first layer of the cake, then top with the butter cream. 
  9. Top it off with the second layer of cake, then give the cake a good dusting with icing sugar.
  10. Make yourself a cup of tea, cut a large slice of cake and enjoy!

Wednesday 9 May 2012

De Waaghals, Amsterdam

Sometimes it's hard finding good vegetarian food when you're away, the last time we went to Amsterdam I'm pretty sure we just ate pizza for the whole weekend (not that I'm complaining, I could eat pizza forever). So even though we decided to book this trip a few days before we actually went, I did some research to try and find good veggie restaurant to try. The only one that stuck out to me was De Waaghals, it had positive reviews on trip advisor and the menu sounded great. So I tried to book online, which wasn't very successful, but we just turned up in the end and explained that we'd tried to book. The guy was really apologetic and said they'd booked us on the wrong day and offered us a table anyway.

Now this review may be slightly biased as we'd just come from the Heineken experience (it's veggie, don't you know) and I was feeling pretty merry. Now if you've been to the Heineken experience and are thinking that it's a bit ridiculous that I was feeling it after two tiny beers, you are correct. But I'm a massive lightweight; I was once sick after drinking only one cider the night before (although it may have also had something to do with the fact I'd been jumping on my bed before work). Any way, I was in a very good mood when we got there and when the food (and more alcohol) arrived the good feelings continued. The restaurant was fairly busy, but there was a few tables left at 7pm. It had a really chilled out environment which made it nice and comfortable. There was also a rather large cat sleeping in the corner, who only got up to be fussed by diners and then let out to play with some other cats, this increased my meal enjoyability by about 150%.
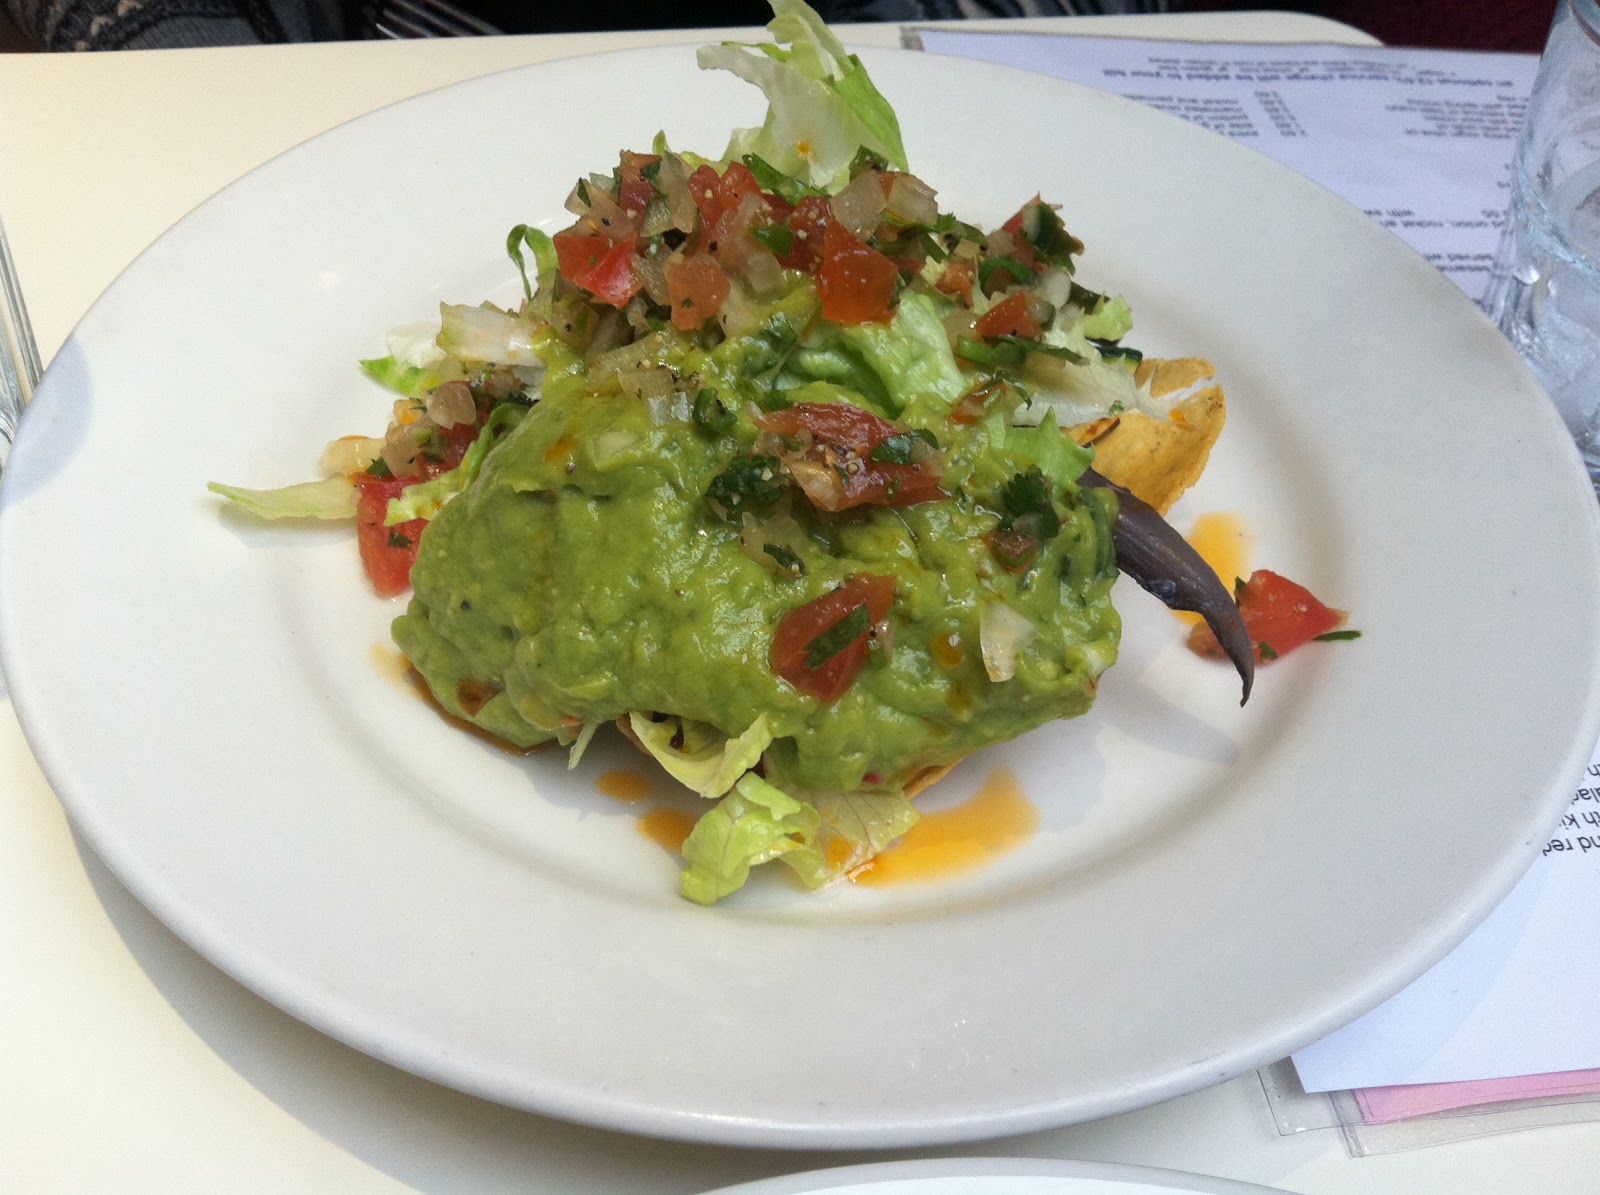
My Classic Dish 
From what I gather from the website and other reviews the menu changes every two weeks, which is great as it means you can try something different each time. Obviously we'd only be going once, but there was still a lot of choice including a Thai dish. We stared off with bread, which I don't really need to go in to detail on, it was good, bready and buttery. For the main meal I had spinach, chard and Parmesan soufflĂ©, crispy fried polenta with sage butter, grilled giant mushroom with green herbs, baked potatoes with green asparagus and a red wine and tomato sauce, sprinkled with black olives. Every single part of this dish was phenomenal, even the dreaded mushroom! My favourite part was the soufflĂ©, it was bright green, fresh, cheesy and delicious.

Mr Hefs Spring Dish
I was with my boyfriend who as you may know hates vegetables and was not too happy about being dragged to a vegetarian restaurant, but even he was delighted when his food came. As he said, if it's well presented and looks edible he'll eat it. He had the braised creamy turnip tops and tomato pappardelle with broad bean sauce, bread crumbs, marinated buffalo mozzarella with basil and olive oil and baked carrots in garlic and ended up really enjoying it. I tried some (of course) and it was just as nice as mine, creamy pasta with fresh garlicy carrots, yum! I think what made it so delicious was that both of the dishes had such a variety of textures and tastes on the plate. It made every bite slightly different and full of flavour.


Another plus point of the restaurant was that it had a great selection of comics, incase you get bored of talking to your partner. Although he couldn't read them as they were in Dutch, my boyfriend had great fun deciphering what was going on and explaining it to me. 

Mr Hef reading some Tin Tin at dinner.
De Waaghals is quite expensive at around £18 for the main meals, but it is definitely worth it. So if you're ever in Amsterdam definitely put this on your agenda!

Saturday 5 May 2012

Mildreds, Soho

I'm on holiday, woohoo. Not an actual abroad holiday, I'm just not working. But being on 'holiday' has made this week a very indulgent one, I've brought new clothes, done my room up a bit and of course I had to fit a good meal in. So off I went to London to meet vegan Emma, who had suggested going to Mildreds. I've read a few very good reviews before so I immediately said yes. From the other reviews I read, it seems like it gets very busy and you end up waiting for a table, we went very early (just before 5) so we didn't have any trouble, but by the time we left the place was buzzing!

Chargrilled roman style artichoke crostini
The restaurant is really cute and cosy which made me like it even before the food came. There was a good variety of dishes on the menu taking inspiration from all over the world and there was a lot of vegan/veggie options that can be turned into vegan options on the menu which meant Emma had a lot to choose from too! We decided to get 2 starters we both liked the look of so that we could share. So we had the tostada with grilled courgette and aubergine, lettuce, pico de gallo and guacamole and the chargrilled roman style artichoke crostini but with basil mayo instead of lemon aioli so that it was vegan. Both starters were so tasty, but overall I think the crostini won it for me, which is weird because as you may know I bloody love nachos and the tostada was like a massive one. But the lemony chargrilled artichoke, with crusty bread and basil mayo was the perfect start to the meal for me.

Tostada
Usually before I go to a restaurant I scour the menu online because I am notoriously bad at making up my mind, but because I didn't have time and the reviews had already sold it to me I didn't on this occasion. Despite this as soon as I saw the bean, tarragon and sundried tomato sausages served with celeriac mustard mash and cavolo nero with pear cider jus I knew it was the one for me. Mainly because I freaking LOVE mustard mash, cavolo nero and cider gravy, so there was no competition really! I don't think the picture does the portion size justice, it was huge and every element tasted amazing. I especially loved the celeriac mustard mash and the pear cider jus topped everything off with a hint of sweetness.
Bean Sausages and celeriac mash
Emma had the mixed mushroom, porcini and ale pie served with fries and mushy peas, which I tried despite my severe hatred for mushrooms. It was still delicious, especially the minted mushy peas!

Mushroom and ale pie
As you can imagine, after this point Emma and I could barely move, but the deserts looked so good we just couldn't pass them up. Luckily you can get desert to take away, so went went for that option and took them home with us to eat after we were on the safer side of fullness. This was the only part of the meal where I didn't go for the vegan option, but I couldn't pass up the chance to try the white chocolate and pistachio cheesecake. I'm glad I didn't because it was simply deeeelightful! The only problem was that I was still slightly full so I didn't manage to eat it all in one go. When I get too full I can't stand having food anywhere near me, so I moved it to the kitchen, however 5 minutes later I some how found myself eating it again, definitely the sign of a good cake! Emma had the banana and coconut tofu cheesecake, which she kindly let me try and I can confirm that it is also amazing!

Pistachio and white chocolate cheesecake
Banana and coconut tofu cheesecake
So if you happen to be in London any time soon, definitely give this one a go. Just get there slightly early so you don't have to wait for a table!

Wednesday 2 May 2012

Banana Jelly

You may remember that in my giant chili sweet potato skins post I was gushing a bit about my love for Morrisons. Well... That love has just gotten a whole lot stronger, because a few days ago I found something a bit exciting. Vegetarian jelly!!! And not only is it animal free, it also comes in banana flavour... AMAZING.


So I thought it would be my blogging duty to let you know how it was. First of all it's not like traditional jelly, as you can see it comes in florescent green crystals. And because it's not made with gelatine you've got carrageen (a type of seaweed) instead, pretty weird right! But it doesn't affect the flavour at all, it tastes like just like yummy synthetic banana.


Making it is just as simple as regular jelly and this one sets in about half an hour so you don't have to wait to eat it! I found this scary fish mold when I was cleaning out my dads house and decided to steal it incase I ever made jelly again. Obviously a great decision, because now I have a whole banana flavoured jelly fish sitting in my fridge :) There were loads of other flavours too, I can't remember them all but I want to try out mango and pineapple next.


So if you're a veggie or vegan and you're missing the wobbly stuff, I definitely recommend a trip down the world foods isle in Morrisons! Happy jellying. 

Twitter Delicious Facebook Digg Stumbleupon Favorites More